| Method: |
| |
|
 |
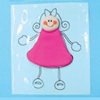
1.
Enlarge size of frame outline to 110mm height. Place a
clear plastic sheet onto outline. |
| |
|
 |
2.
Roll flesh color clay into shape of face following the
outline and dot eyes with a black marker. (For flesh color,
refer to Makin's Clay Mixing Ruler Chart.) Paint or make
cheeks with clay according to size of paper pattern. Make
mouth with Makin's Chisel. Roll neon gpink clay into shape
of dress according to paper pattern. |
| |
|
 |
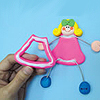
3.
Make
neon pink dress frame according to paper pattern. Use
yellow clay to make hair and light blue clay for shoes.
Use Makin's Chisel to mark shoelaces. |
| |
|
 |
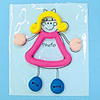
4.
Put hair, face and dress in place by following the outline
and add a ribbon on the head with green clay. Glue together.
|
| |
|
 |
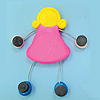
5.
Use flesh color clay to make hands and apply glue on back
of hands. Sandwich wire between hand and another round
piece of flesh color clay. Add glue on back and attach
magnet. Glue the wire with hands right under the head. |
| |
|
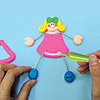 |
6.
Do the same with shoes but use light blue clay for the
back, then attach magnet. Glue wire to dress. |
| |
|
 |
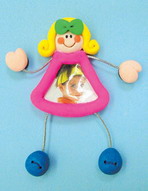
7.
Glue dress frame on top of dress and tidy edges with Makin's
Chisel. |
| |
|
 |
8.
Insert favorite photo and add a clear plastic cover sheet
on top. |
| |
| Designed
by - MAKIN'S CLAY® Design Team |