| How: |
| |
|
 |
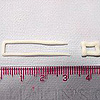
1.
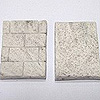
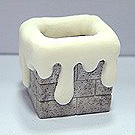
Mix white and black clay together unevenly to create a
stone-like effect. Roll a 5mm thick, 80mm x 100mm sheet
with Makin's Roller. Cut out two 40mm x 40mm, two 40mm
x 30mm, and one 30mm x30mm from the sheet with Makin's
Roller & Cutter. |
| |
|
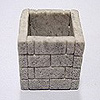 |
2.
Pin holes on one surface of all light grey sheets with
a bunch of toothpicks. Mark brick pattern with Makin's
Mallet as shown. Do not miss the two lateral sides of
each sheet. Stick all sheets in place. |
| |
|
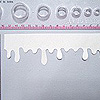 |
3.
Cut out the paper pattern as shown. Roll white clay into
a sheet with Makin's Roller then cut according to the
pattern. |
 |
 |
 |
4.
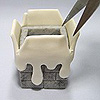
Stick the snow strip pattern on the chimney as shown then
trim the corners of the unattached strip. Cover the inner
part of the chimney with snow strip and smooth over the
edges. |
| |
|
 |
5.
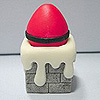
Roll red clay into a long taper shape. Roll one end narrower
for the foot of Santa, then put the foot end inside the
chimney and push the top part of shape down slightly.
|
| |
|
 |
6.
Extrude black clay into a rope with Makin's Clay Gun Extruder
for the belt. Flatten the rope with Makin's Roller then
stick it around the waist of Santa. |
| |
 |
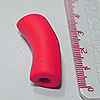 |
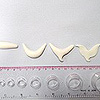
7.
Roll red clay into a log then curl into a C-shape. Cut
one end straight and the other diagonally. Hollow the
straight end of rope with the small stick of Makin's Clay
Mixing Ruler as shown. Do the same for the left arm. |
| |
|
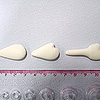 |
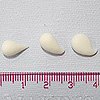
8.
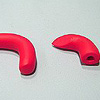
Roll white clay into two teardrop shapes then slightly
flatten. Press the clay into the shape shown with a clay
pusher. |
| |
 |
 |
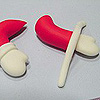
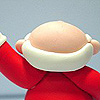
9.
Insert and stick the narrow parts of the gloves into the
holes of both arms with the thumbs pointing upwards. Roll
white clay into a rope then wrap it around the sleeves
to make the cuffs. Stick both arms in place. |
| |
|
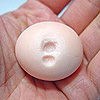 |
10.
Roll flesh colored clay into an egg shape for the nose.
Roll flesh colored clay into an oval shape for the head.
Press one hole at the center of face for placing the nose
and a small hole below for the mouth with the small stick
of Makin's Clay Mixing Ruler. |
| |
|
 |
11.
Roll flesh colored clay into two balls then flatten them
slightly. Stick in place and indent a hole in each ear
as shown. |
| |
|
 |
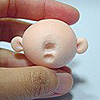
12.
Roll white clay into a two-ends-pointed taper shape to
form the beard. Press and twist clay as shown. Attach
the beard to the face making sure the hole for the mouth
is not covered. |
| |
 |
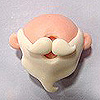 |
13.
Roll white clay into two teardrop shapes for the moustache.
Coil the tails of teardrop shapes with fingers and slightly
flatten them. Attach to face as shown then put the nose
on top. |
| |
 |
 |
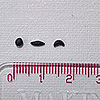
14.
Roll black clay as shown to make eyes then attach to the
face. Stick the head on place on the body. |
| |
|
 |
15.
Roll white clay into a strip for the hair then stick at
the back of head as shown. |
| |
|
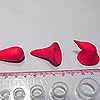 |
16.
Roll red clay into a teardrop shape for the hat. Flatten
the blunt end and hollow it as shown. Shape the tip and
stick a ball of white clay into it. Place the hat onto
the head then line the joint with white clay as shown.
|
| |
|
|
17.
Roll white clay into two ropes for the eyebrows. Bend
to shape then stick onto Santa's face as shown. |
| |
 |
 |
18.
Extrude white clay into a thin rope with Makin's Clay
Gun Extruder for the belt lock. Fold it into a 8mm x 5mm
rectangular shape as shown. Stick in place. Add one small
rope for the belt pin. |
| |
|
 |
19.
Roll black clay into small buttons and stick them onto
Santa. |
| |
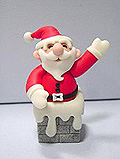
| Designed
by - Dorothy Chan, MAKIN'S CLAY® Design Team
|
