| Method: |
| |
|
 |
1.
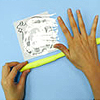
Take all of neon yellow clay and roll out a long rope.
Lay the snake on top of the paper pattern covered with
a clear plastic sheet. Coil clay and make head stick out
on one side. Shape head then flatten coil slightly. Leave
to partly dry while you make the decorations. |
| |
|
 |
2.
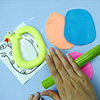
Roll white clay into two balls for eyes and add pupils
with black marker. Cut a small piece of red clay to make
fork tongue. Attach eyes and tongue to head. Roll neon
orange, pink and blue into 1mm thin sheets using Makin's
Roller. |
| |
|
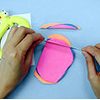 |
3.
Layer
the three sheets onto each other and trim into rectangle.
|
| |
|
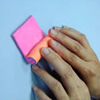 |
4.
Tightly roll up the rectangular layers into coil. Wait
20-30 minutes for the drying then cut into 1mm thick slices
and spread randomly onto snake, securing with white glue. |
| |
|
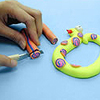 |
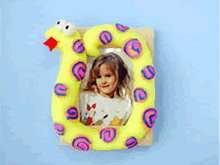
5.
Wait for the snake body to be half dry then glue onto
wooden frame. Leave overnight to dry thoroughly.
|
| |
| Designed
by - MAKIN'S CLAY® Design Team |